3CX setup guide
Before you begin
Admin Access
3CX console account with administration permissions.
Paytia XML File
SIP trunk XML profile provided by Paytia. Contact us if you do not have this.
Phone Numbers
E.164 formatted numbers (+44, +1, etc.) for your account.
Secure payment processing with 3CX integration
Paytia adds a dedicated SIP trunk route on 3CX phone systems, allowing all calls to be secured by Paytia card capture services.
PCI Compliance
Remove your 3CX system from PCI scope by routing sensitive payment data through Paytia secure infrastructure.
Secure Capture
DTMF masking and agent-assisted payment capture ensure card details never reach your 3CX system.
No Disruption to Call Flows
Your existing call flow stays the same. Paytia slots in to handle the payment step without rebuilding what already works.
How It Works
When a customer needs to make a payment during a call, your agent dials 729 on their 3CX handset or softphone keypad to start Paytia secure payment capture. The customer completes their payment safely, and control returns to your agent -- all without interrupting the conversation.
Setup instructions
Follow these 17 steps to import and configure the Paytia SIP trunk profile in your 3CX system.
Access 3CX Administration
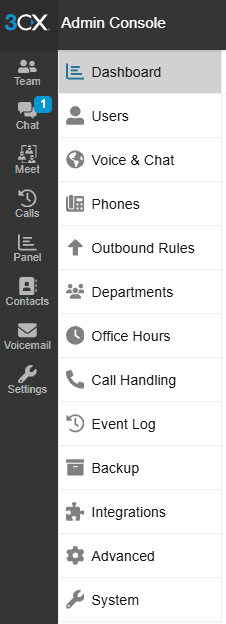
Log into your 3CX console using an account with administration permissions. You will see the Admin Console interface with the navigation menu on the left side.
Open Admin Panel
On the bottom left corner of your 3CX console you will now see an Admin button with a cog icon. Click the Admin icon.
Navigate to Advanced Menu
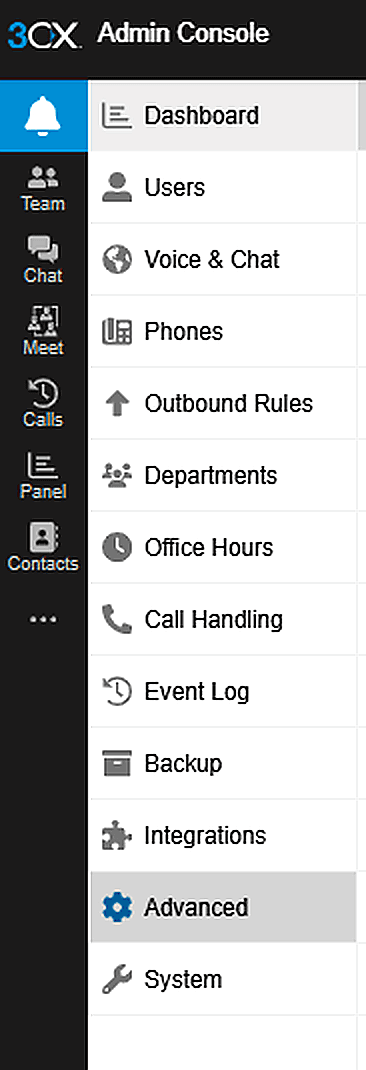
Now click on the Advanced menu option.
Access Templates
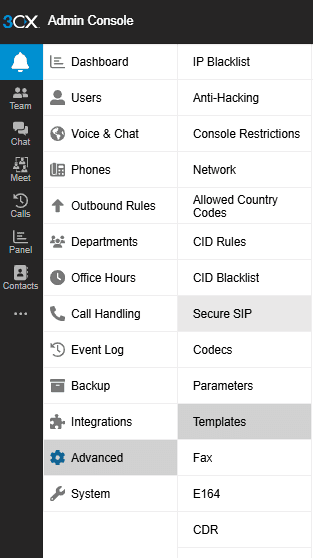
Now click on the Templates menu item.

Provider Templates Tab
Now click on the Provider Templates tab.
Import Provider
Click the import Provider button.
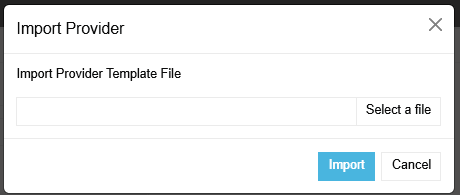
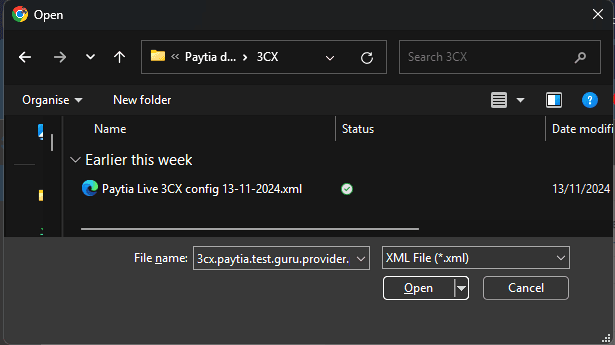
Select Paytia XML File
Use Select file to browse to the Paytia 3CX xml file.
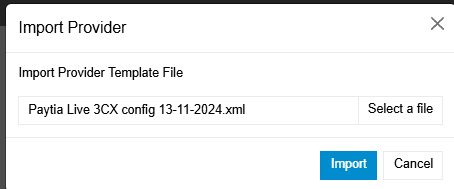
Import the Profile
Click the Import button.
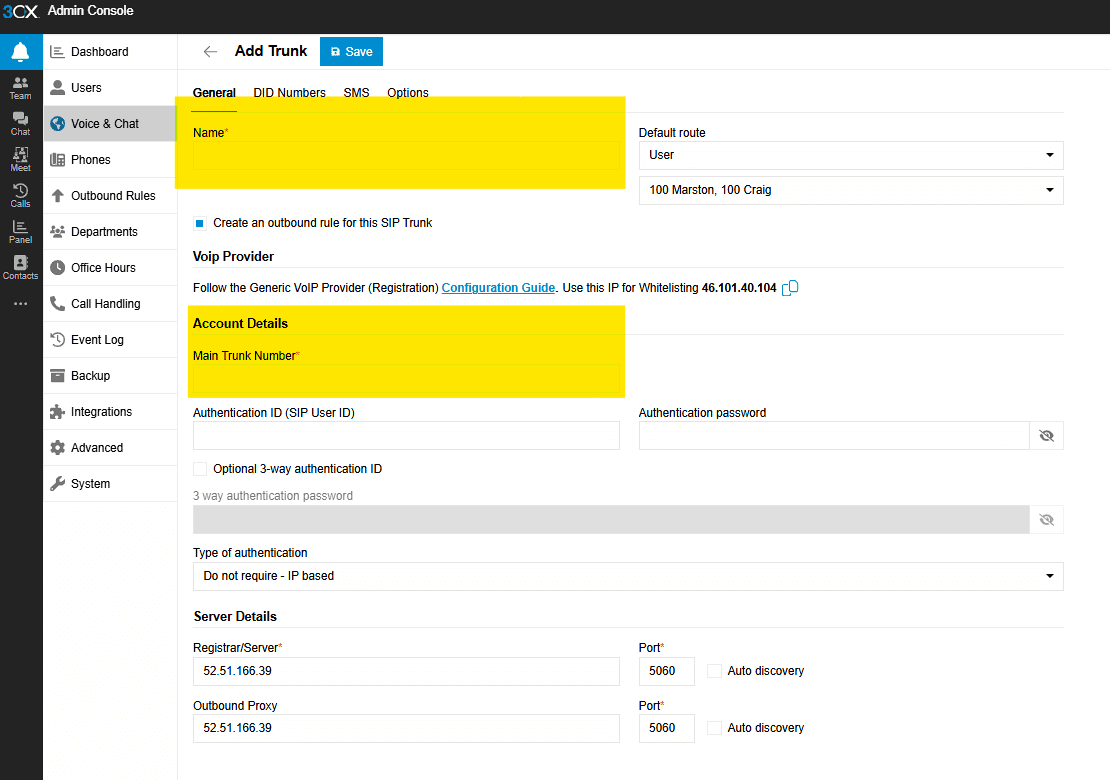
Configure Trunk Profile
Add the name of the trunk profile, e.g. Paytia Live and the phone number (this must be in e.164 +44, +1 etc format) you want to use with your Paytia account.
Add DDI Numbers
Add any additional DDI telephone number you will use with your Paytia account.
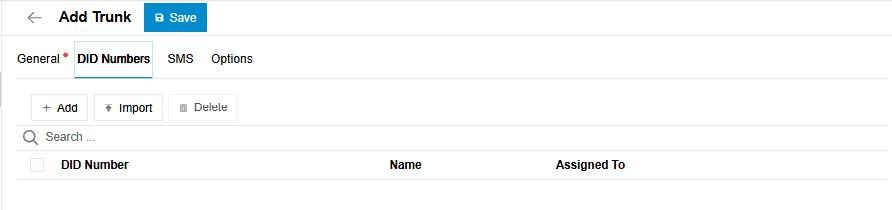
Save Phone Numbers
Type in your numbers one by one and click the Save icon next to the number.
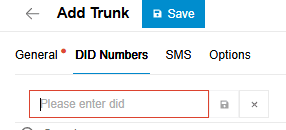
Example Configuration
Example of properly configured phone numbers.

Save Configuration
Click the Save button to save your trunk configuration.

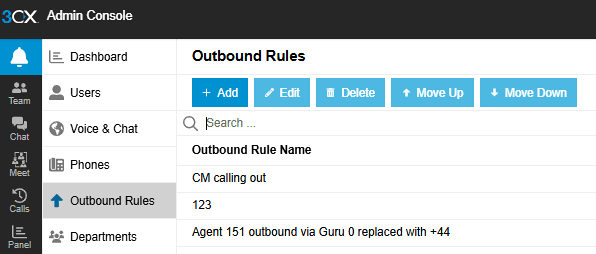
Setup Outbound Rules
Now you will be asked to setup an outbound rule to allow calls to be routed to this SIP trunk profile.
For complete outbound rules configuration, see: 3CX Outbound Rules Complete Example
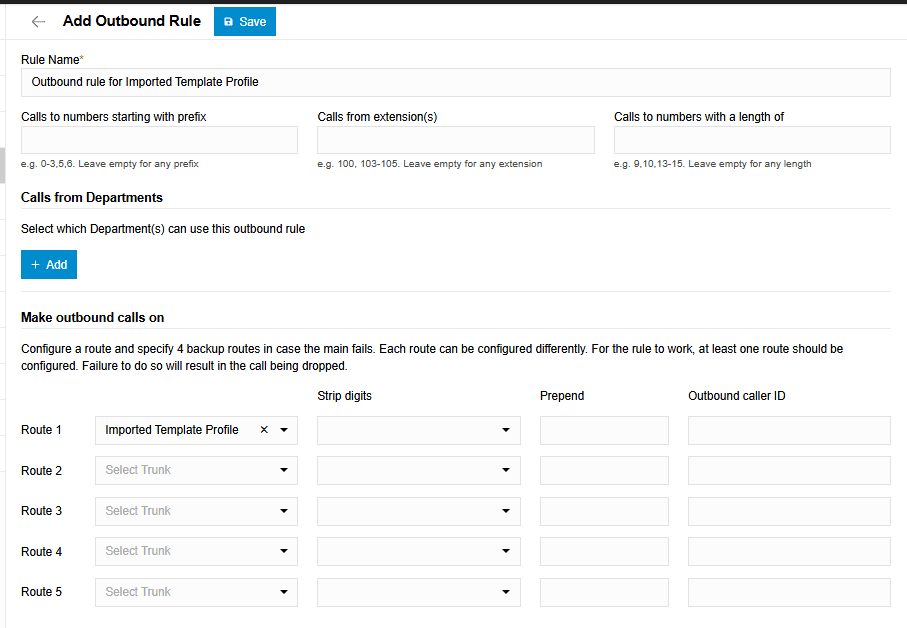
Configure Dial Rules
Paytia suggest by default you add these rules: +44, 0 -- strip 1 digit and append +44.
Recommended rules:
- +44 -- For UK numbers
- 0 -- Strip 1 digit and append +44
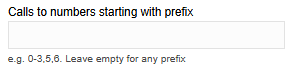
Save Rules
When you have finished adding a rule Save.

Complete Setup
You will be taken to the Outbound Rules list where you can add as many dial rules as you like.
Technical architecture
Secure SIP Trunk Architecture
Paytia creates two SIP trunk profiles allowing calls from external carriers to pass through Paytia to the 3CX system inbound and outbound. This design allows you to remove 3CX from PCI-DSS scope and allows call recording to remain active at all times.
PCI-DSS Compliance
Removes 3CX from PCI-DSS scope entirely
Call Recording
Maintains active call recording at all times
User Access
Any 3CX user can process payments securely
Disaster Recovery and Business Continuity
Paytia is able to host multiple SIP trunk endpoints per number allowing granular delivery of disaster recovery and business continuity routing. Intelligent failover routing ensures your business remains operational.
Need help with setup?
Our technical team can walk you through the 3CX configuration process or handle it for you.
Not sure if 3CX + Paytia is right for you? Read our 3CX integration overview for the commercial story, or see all our telephony partners.
Documentation
Full written guide with screenshots for every step.
Video Walkthrough
Watch our setup video showing the complete process.
Technical Support
Our team can configure it for you remotely.
Need setup assistance?
Our technical team is here to help you complete your 3CX integration successfully.