How do I configure Aircall with Paytia?
Two halves to this: getting your Paytia account signed up and connected to a payment provider, then pointing Aircall at it. Both sets of steps are here in order.
Configuring Aircall with Paytia
Paytia sign-up
1. Enter in your email address, set a password and accept terms of use.

2. Check your email for verification link.

3. Verify email address and log in.

4. Select Get started

5. Sign in or sign up for a Stripe account

6. Confirm the currency you want to take payments in

7. Confirm payment handling details.

9. Select your Paytia secure payment telephone number.

10. Confirm the billing details and enter in credit or debit card details.

Aircall Configuration
1. On log in to your Paytia account enter the email address and password you set earlier and click login.
2. Click Connect With Aircall to begin configuration.

3. Click Yes to proceed.
4. Sign into your Aircall account.

5. Authorise Paytia to access your Aircall account. Allowing your teams, users and telephone number to be imported by clicking Authorize.

6. You can now select the telephone number you want your customers to see when your business is calling them. You will be able to assign different numbers to teams later in the set up process.

7. Assign email delivery addresses to each Team/Department that has been imported. Once completed click Submit to continue.

8. You can now pick the agents you wish to be allowed to process payments. You can select agents up to the number of available Paytia agent licenses you are subscribed to. Once selected click Submit.
9. You can now assign your users to the telephone number customers will see outbound telephones being made from and to the correct Paytia department for payment alerting and reporting. Once completed click Submit.
(You can resync Aircall information at any point from both the dashboard and the Agent Capture Assist)
Inbound Calling
1. Your users will automatically receive a welcome email inviting them to set their password.

2. Aircall users will be logged into their Aircall softphone application.

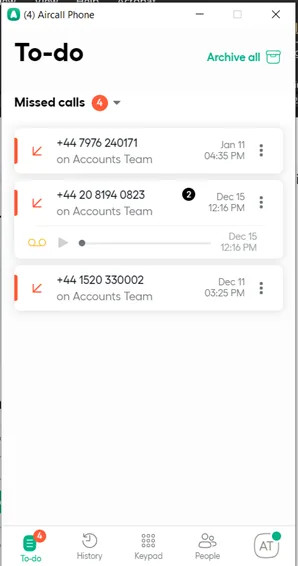
3. Your users can now login to paytia at: log in to your Paytia account

4. When users log in they will see the payment dashboard. If users only take payments inbound or outbound calls this setting can be changed by adjusting the settings in the admin portal.

a) A customer has called in using the new Paytia telephone number chosen in setup
b) Paytia has forwarded that call to the team of the aircall user
c) The aircall user has answered the call.
d) A payment is required to be taken.
e) The user logs into their Paytia portal and clicks the Inbound payment button (shown below)

6. When the users softphone is called they will see it is a payment call as it will be displayed on the insight card. Clicking the insight card link takes the agent to the Agent Capture Assist login screen.


8. The user can now enter the card holders billing and shipping address. These are used by the payment provider as extra validation of the cardholders identity. Then click Submit payment request

Outbound Calling
Outbound calling – if the user wishes to place an outbound call they will follow this procedure
- Log into the Paytia portal
- Click the Outbound button
- Enter the telephone number they wish to call
- Click the Send Number button to trigger the aircall softphone to dial

The user will now hear instructions played to them over their aircall softphone.
- Please enter your three digit agent ID. This is shown on the users screen.
- The user will confirm the ID entered was correct by dialing 1 on their airphone keypad
- The call is started automatically to the telephone number the user entered to be dialed in step 1. Process is then the same as from Step 7 on an inbound call.
More in Aircall
Porting Telephone Numbers from Aircall to Paytia
Porting puts us in front of Aircall, so card data never reaches Aircall, your agents, your recordings or your CRM. Your existing Aircall setup stays as it is.
Troubleshooting Aircall Popup Error: "Number Not Found or Invalid Number to Dial"
That pop-up means there's no default number set on your Aircall softphone. When we ask Aircall to dial out, Aircall doesn't know which number to use.
What are the alternative phone-routing options for using Paytia with Aircall?
Two ways to route inbound calls: everything through Paytia, or only the calls that need a payment. Which suits you comes down to call volume.
aircall, add Paytia number to aircall
Aircall has to make this change, not us. Here's who on your team is allowed to raise the ticket, the wording to use, and what Aircall will ask you for.
Conference Pay with Gladly
Gladly was the first call centre platform to run Conference Pay. We join the call as a third party, take the card details with the agent muted, then drop out.
Still need help?
Our support team is here to help. Submit a ticket and we'll get back to you within one business day.